The Emotional Space | #19 | Ableton

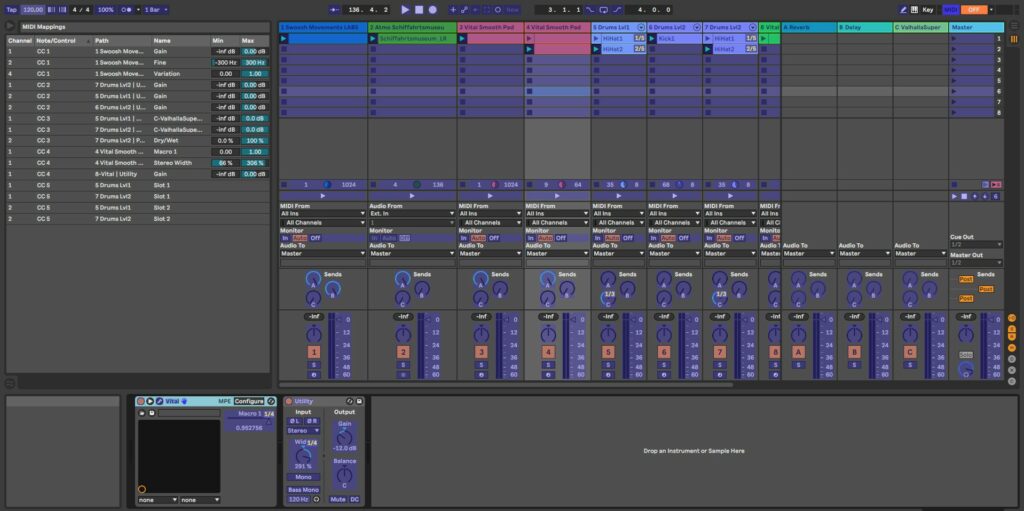
While the composition should of course always be in the back of my mind while developing the logic and mappings, the part in Ableton is where the music finally comes into play. I have not found a great workflow for creating such a composition yet, since I mostly end up changing mappings around, but I think when the time comes that I know my mappings quite well, the workflow also becomes a little easier and more intuitive.

I think that Ableton is a great choice for exactly this type of application because it was developed for live settings – which this installation also belongs to. Ableton’s session view is arranged in clips and samples that can be looped and will always play in sync, without an ending time. I am mostly playing all tracks at once and use the MIDI parameters to turn up the volume of certain tracks at certain points.

Composing for this format reminds me a lot of what I know about game sound design, since the biggest challenge seems to be to create a composition that consists of parts that might play together in ways one can barely anticipate, while it should still always sound good and consistent.

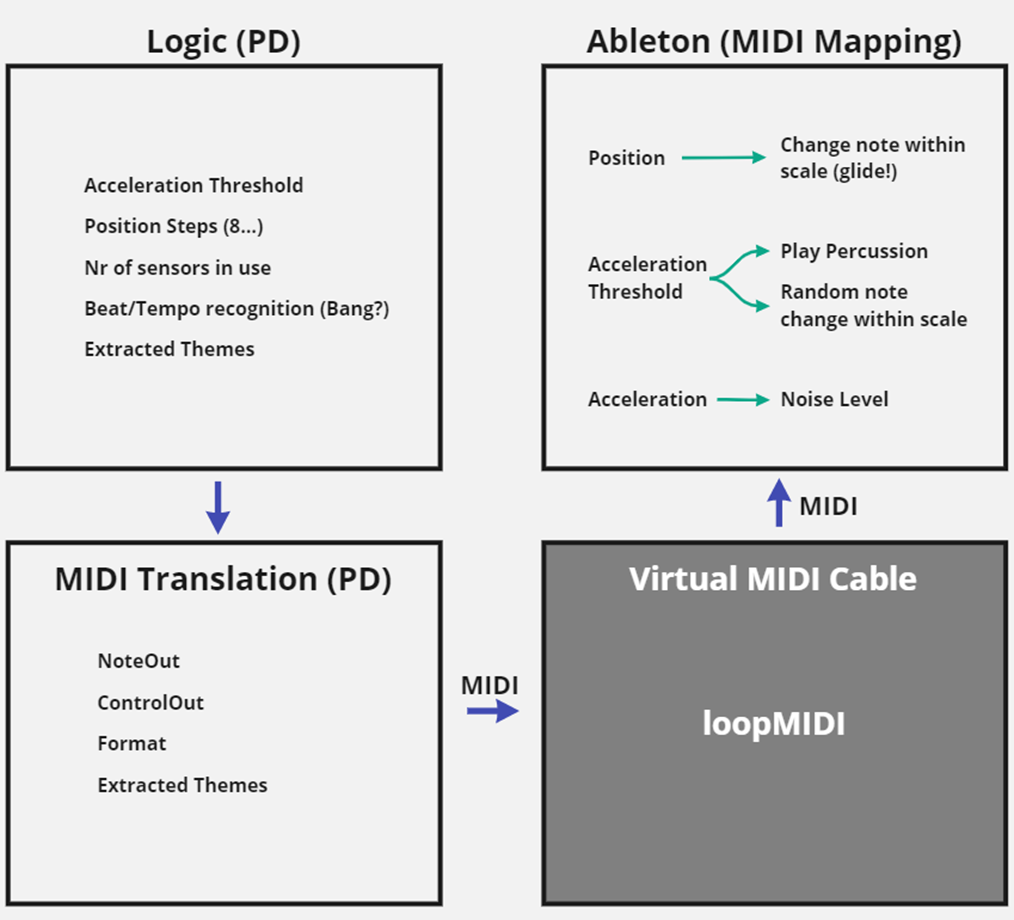
For the proof-of-concept composition, I used some stereo atmosphere I recorded myself and adjusted the width of it depending on the dispersion of the particles. A pad with many voices was also always running in the back, with slight pitch adjustments depending on the particle average position, as well as a low pass filter that opens when one’s arm is lifted up and closes when it is pointing downwards. With each soft movement, a kind of whistling sound is played, that is also modulated in pitch, depending on the arms position (up/down). This whistling sound also gets sent into a delay with high feedback, making it one of the only sounds at that level that reveals the BPM. As soon as the second level is reached, a hi-hat with a phasor effect on it starts playing, bringing a bit more of a beat into the soundscape. The phasor is controlled by the average velocity of the particles. The pattern of the hi-hat changes with a five-percent chance on every hard movement. The third level slightly changes the pad to be more melodic and introduces a kick and different hi-hat patterns. All in all, the proof-of-concept composition was very fun to do and worked a lot better than expected. I am looking forward to spending more time composing next semester.

The Emotional Space | #18 | MIDI

To be able to send MIDI data to Ableton, there is a need to run a virtual MIDI cable. For this project, I am using the freeware “loopMIDI”. This acts as a MIDI device that I can configure in Pure Data’s settings as MIDI output device and in Ableton as MIDI input device.

In Pure Data, I need to prepare data to be in the right format (0 to 127) to be sent via MIDI and then simply use a block that sends it to the MIDI device, specifying value, device, and channel numbers. I am mainly using the “ctlout” block, which sends control messages via MIDI. I did experiment with the “noteout” block as well, but I did not have a need for sending notes so far, since I rather adjust keys and notes dynamically in Ableton.

There is a mapping mode in Ableton, which lets one map almost every changeable parameter to a MIDI pendant. As soon as I turn on the mapping mode, I can just select any parameter that I want to map, then switch to Pure Data, click the parameter that I want to map to the Ableton variable, and it will immediately show up in my mapping table with the option to change the mapping range. While this approach is very flexible, it unfortunately is not very well structured since I cannot read or edit the mapping table in another context (which would be very useful to avoid mistakes while clicking).

The Emotional Space | #16 | Mapping & Communication

Before I write about the core logic part, I would like to lay out how the communication between Pure Data and Ableton looks like. Originally, I had planned to create a VST from my Pure Data patch, meaning that the VST would just run within Ableton and there is no need to open Pure Data itself anymore. This also gave me the idea to create a visualization that provides basic control and monitoring capabilities and lets me easily change thresholds and parameters. I spent some time researching possibilities and found out about the Camomile package, which wraps Pure Data patches into VSTs, with visualization capabilities based on the JUCE library.

However, it did not take long until I found several issues with my communication concept: First off, the inputs of the Expert Sleepers audio interface need to be used, while any other interface’s (or the computer’s sound card’s) outputs must be active, which is currently not possible natively in Ableton for Windows. There would be a workaround using ASIO4ALL, but that was not a preferred solution. Furthermore, a VST always implies that the audio signal flows through it, which I did not really want – I only needed to modulate parameters in Ableton with my Pure Data patch and not have an audio stream flowing through Pure Data, since that would give me even more audio interface issues. This led me to move away from the VST idea and investigate different communication methods. There were two more obvious possibilities, the OSC protocol and MIDI. The choice was made quite quickly since I figured that the default MIDI resolution of 128 was enough for my purpose and MIDI is much more easily integrated into Ableton. Now with that decision made, it was a lot clearer what exactly the core logic part needs to entail.