Zeit für eine Zusammenfassung

Dieser Blogeintrag hätte noch den zweiten Versuch der analogen Doppelbelichtung thematisieren sollen. Doch aufgrund der verzögerten Lieferung der Abzüge ist dies leider nicht möglich, da es jetzt am Ende des Semesters Zeit ist, die Experimente zusammenzufassen und das Resultat zu bewerten. 

Die letzten Wochen waren geprägt mit der Durchführung der Experimente. Ich widmete mich der Doppelbelichtung – digital als auch analog und erarbeitete weitere Schritte im Bildbearbeitunsgprozess. Die digitale Doppelbelichtung mit der Systemkamera zu Beginn war sehr erfolgreich und recht einfach umzusetzen. Da ich mich schon länger mit der digitalen Fotografie beschäftige, konnte ich die Schritte ohne Probleme durchführen. Der Vorteil der digitalen Doppelbelichtung war das sofortige Ergebnis. Innerhalb ein paar Sekunden konnte ich in der Kamera das Resultat anschauen und bewerten. Das Aufeinanderlegen der zwei Fotos erledigte bereits meine Kamera. Im zweiten Experiment befasste ich mich mit der analogen Doppelbelichtung, was zu einem unerwarteten Ergebnis führte. Nur ein paar Fotos wurden entwickelt und konnten begutachtet werden. Interessant war hier, dass zwei Fotos sich gegenseitig ergänzen konnten und sozusagen ein analogen Puzzle enstand. Im dritten Experiment erstellte ich Doppelbelichtungen mit der Sofortbildkamera. Auch hier war es vorteilhaft, das Ergebnis nach ein paar Minuten in den Händen halten zu können. Im letzten Experiment nahm ich die wenigen Abzüge des zweiten Experiments als Grundlage für eine digitale Weiterbearbeitung. Ich stellte fest, dass noch andere Fotos auf den Filmstreifen zu sehen waren und diese nicht im Labor vergrößert wurden. Also zweckentfremdete ich den Video Kopierer und steckte die Negative hinein, um sie dann mit der Systemkamera abzufotografieren. Das ist mir sehr gut gelungen und ich konnte anschließend verschiedene Farbeinstellungen in Photoshop vornehmen. Dazu zählte das Erstellen der animierten gifs, um die Farbunterschiede deutlich zu machen. 

Allgemein war für mich die Schnittstelle zwischen analog und digital sehr interessant. Auch wenn ich zuvor analog gearbeitet habe, kam ich irgendwann an einen Zeitpunkt, an dem ich meine Abzüge digitalisieren musste. Für die Aufbereitung der Blogposts führte kein Weg daran vorbei. Dieser Schritt in die digitale Welt eröffnet unendlich viele Möglichkeiten. 

In den verschiedenen Experimenten stand jeweils die Technik und die Durchführung im Vordergrund. In Zukunft möchte ich mich noch mehr mit dem Inhalt der Fotos beschäftigen – also was auf den Bildern zu sehen ist. Bei den Polaroids (und eigentlich auch auf den neuen analogen Abzügen, die bis heute noch nicht entwickelt wurden) habe ich es schon versucht, den Inhalt bewusst zu wählen. Das Prinzip der übereinander liegenden Ebenen (der zwei Fotos) und dem Gegensatz von analog und digital kann ich inhaltlich aufgreifen. Beispielsweise dienen Gegensatzpaare wie Natur und Stadt oder Farb- und Formunterschiede eine Menge an Möglichkeiten, die ich fotografisch festhalten kann. Somit ergänzen sich die visuelle Ebene und die methodische Durchführung. 

Für das weitere Vorgehen werde ich mich noch mehr mit dem Inhalt auseinandersetzen. Dazu zählt die Recherche nach bekannten Fotograf*innen und Kunstschaffende, die ähnliche Arbeiten erstellen. Ich denke, dass ich mich davon inspirieren und leiten lassen kann, um mein Themengebiet zu erweitern und einen Fokus für das kommende Semester zu setzen. 
Type Specimen #2

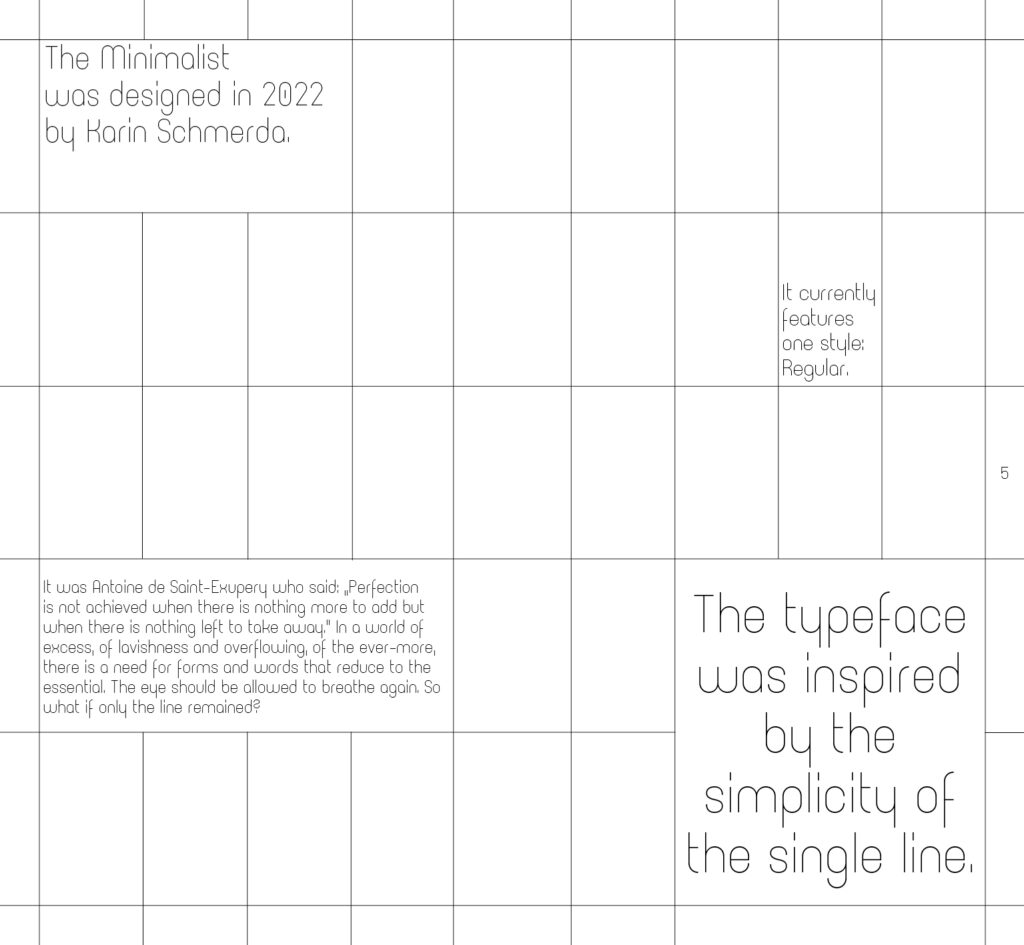
Erste Seiten des Type Specimen Books von The Minimalist

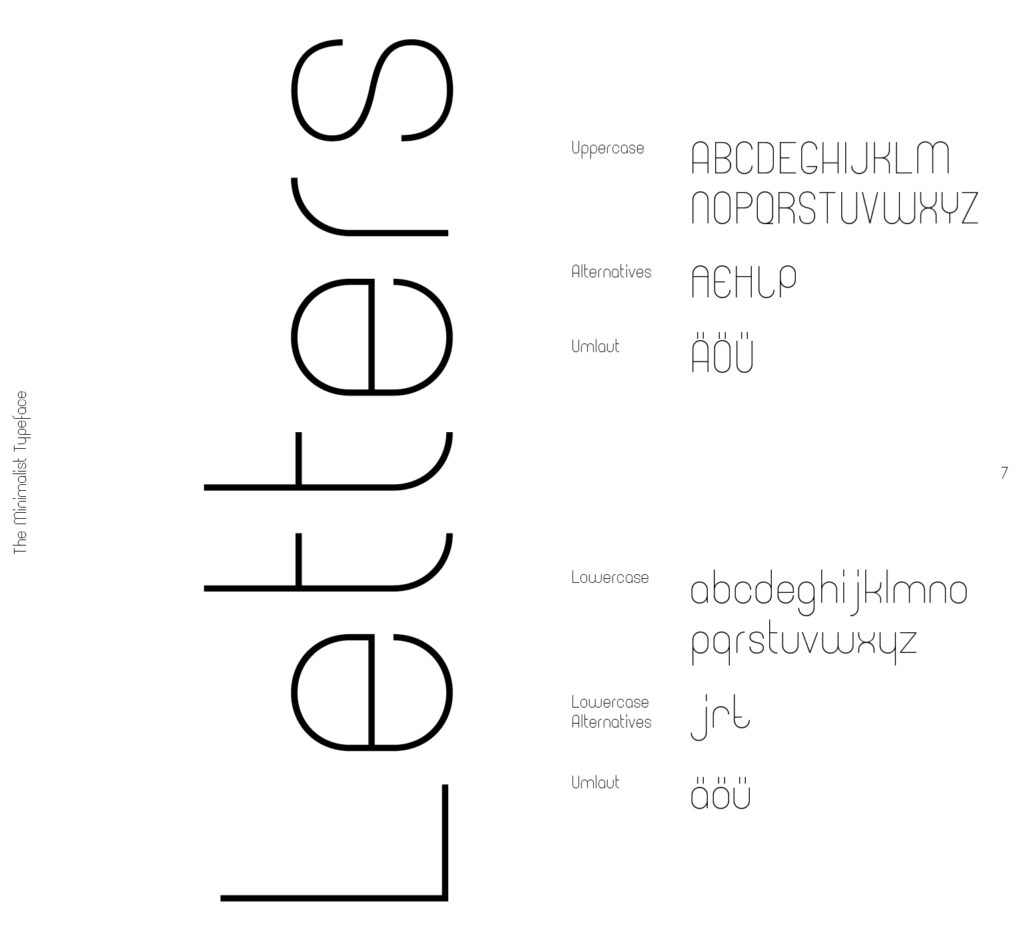
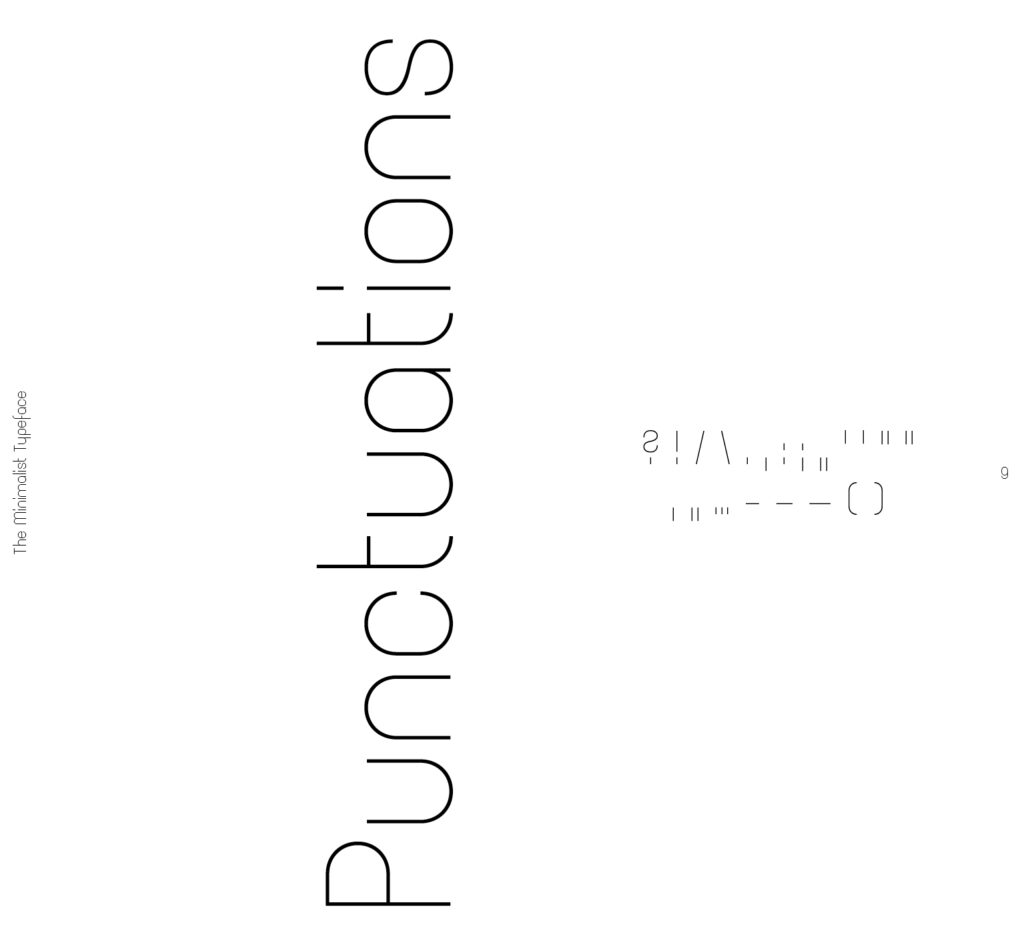
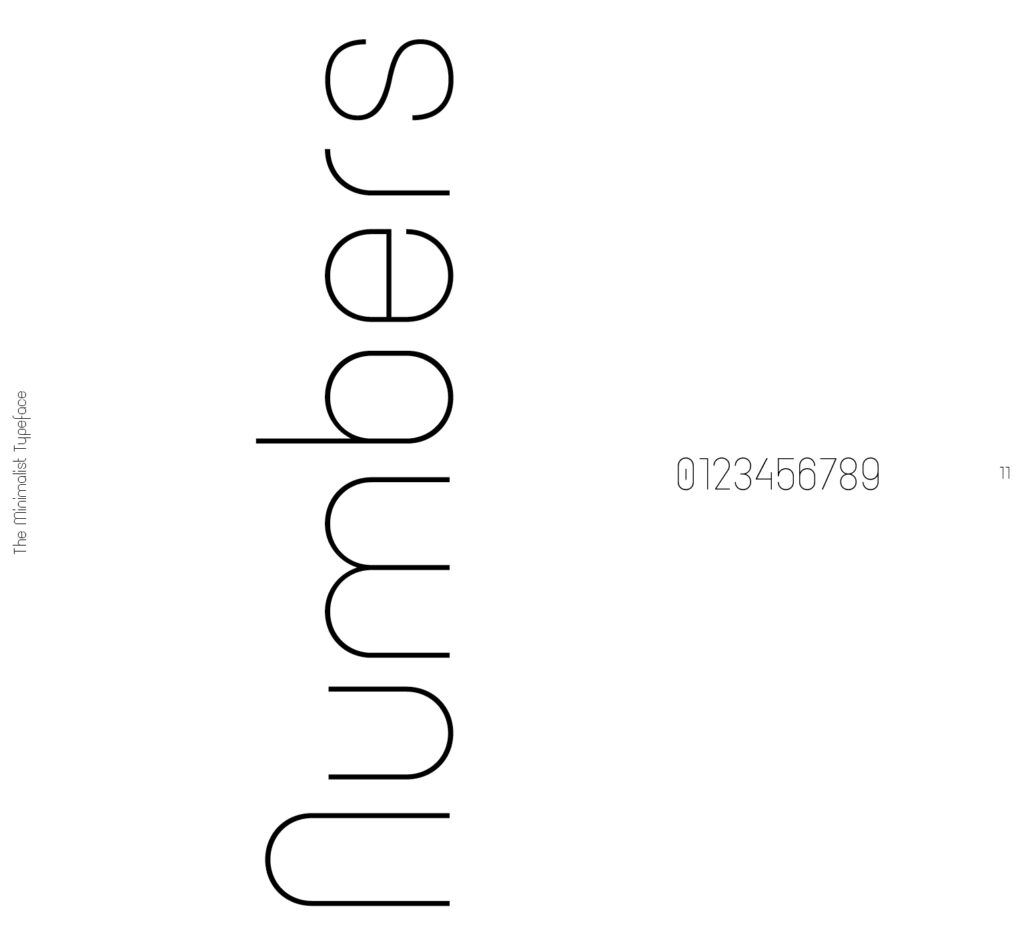
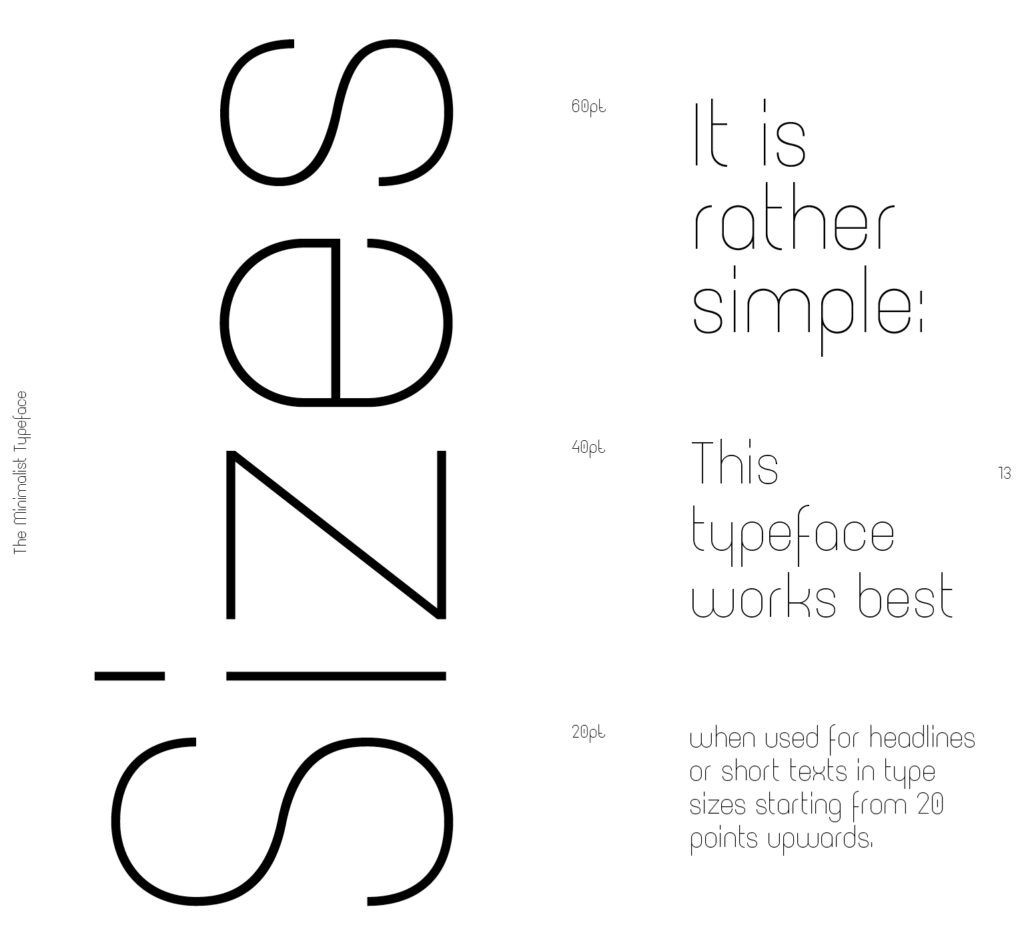
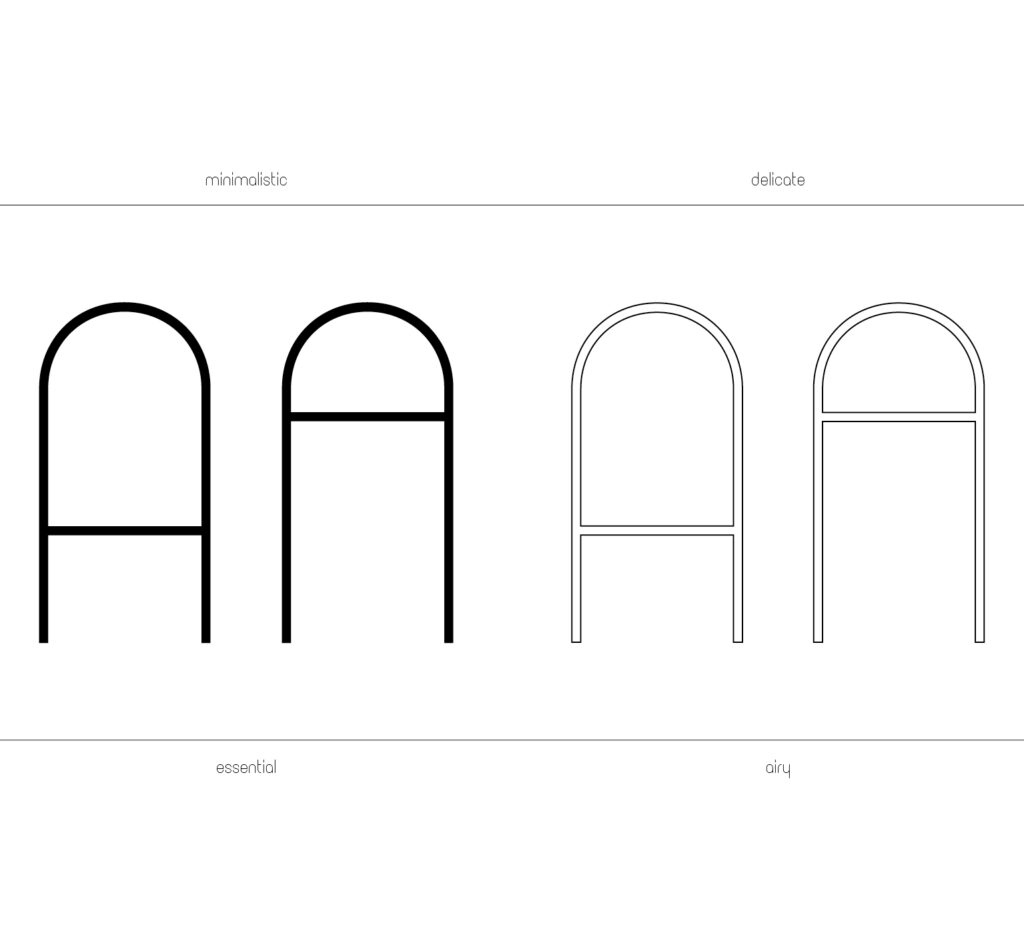
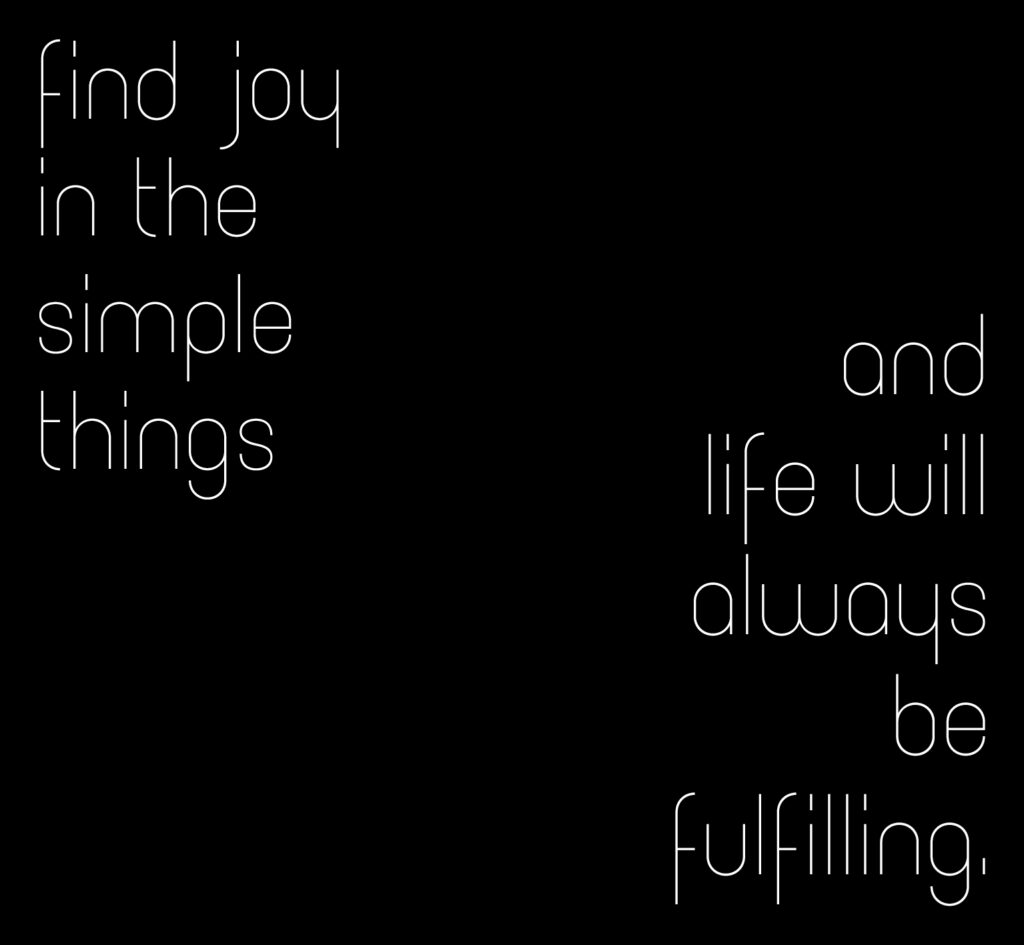
Um diese Lehrveranstaltung für dieses Semester abzuschließen, möchte ich in diesem letzten Blogbeitrag die ersten Seiten meines Type Specimen Books präsentieren. Die Analyse anderer Specimen Books, die ich zum Inhalt des letzten Beitrages gemacht habe, diente nun als Grundlage für diese ersten Layouts: eine kurze Beschreibung der Schrift, eine Übersicht über alle in der Schrift vorhandenen Zeichen sowie Beispieltexte in unterschiedlichen Größen. Des Weiteren sollen anhand typografisch sehr unterschiedlich gestalteter Seiten die Möglichkeiten der Schrift gezeigt werden. Jedes Layout soll dabei trotzdem den Charakter der Schrift optimal in Szene setzen. Die Essenz der Schrift The Minimalist ist die Reduktion auf das Wesentliche: die simple Linie. Nahezu kein Kontrast in der Strichstärke und Formen, die aus der Symbiose von Kreis und Geraden entstehen zeichnen die Schrift aus. Die Schrift umfasst einen Schriftschnitt (Regular), der als Display Font Verwendung finden soll. Als solche vermittelt sie dem Layout einen minimalistischen Stil, sanft und luftig. Opulenz hat keinen Platz und soll es auch nicht haben. The Minimalist schafft Bühne für das Wort.

Des&Res 2. How to bring Lab closer to the streets

Today, design is rapidly developing in various areas of our lives. Design thinking began to be used in medicine, biology, products, and much more. People realized that by combining different disciplines we can achieve much better results. At the university, we are often told that by gathering specialists from different fields, we can consider the same project from different angles and understand it more holistically by looking at it from the faces and perspectives of different people. Now global companies clearly select employees with different backgrounds and different temperaments to work on the same task. At Design Week 2022 in Graz, we also had such an amazing experience.
This year, as students of Fh-Joaneum, we had the opportunity to work at Karla Molins Pitarch’s workshop, which was called UXD How to bring Lab closer to the streets. We spent a whole week working on the project from the very beginning to finish. The task was to understand and convey complex information with the help of design for people who are not related to biology in any way. The tutor divided us into two-person groups and we, as people with different backgrounds, had to design something new for our consideration.
From day one, we received a special Toolkit designed by Karla. It was supposed to help us in the process of creating our product. The purpose of the toolkit itself was to unite people from different areas and facilitate the process of joint work with the help of detailed information describing each step in the design process. The toolkit itself contained such subdivisions as knowledge, transdisciplinarity, applied design research, and outreach. Everything started with the lab and led to the street. Each of the divisions contained points that had to be completed in order to move to the next step. Each of the divisions was described in detail so that people who encountered the process for the first time could find everything they need and understand what to do next. Personally, the toolkit really helped me, even though I have been working with the design thinking method for quite some time. He helped me remember the process and follow it in detail. I plan to use it also in the process of writing my master’s thesis.
Unfortunately, we, people who did not have general knowledge of the topic of biology, needed to understand the theme of our workshop from the basics. Our task was to realize what chromatin is and how DNA is built on its basis. We needed to create some design system that would tell people who need clarification what exactly chromatin is.”Chromatin is a nucleoprotein that forms the basis of chromosomes. It consists of DNA and proteins (mainly histones). Chromatin is found inside the nucleus of cells of eukaryotes and archaea that have histones. In a broader sense, chromatin is sometimes also called the substance of the nucleoid in bacteria. It is in the composition of chromatin that genetic information is realized, as well as DNA replication and repair.
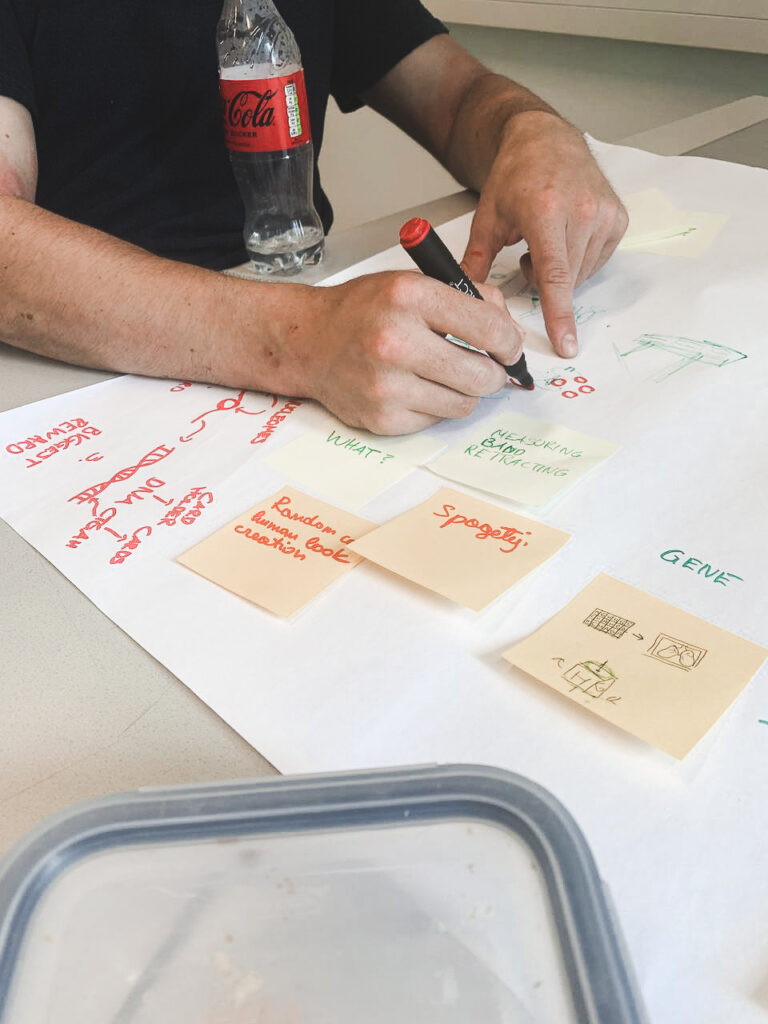
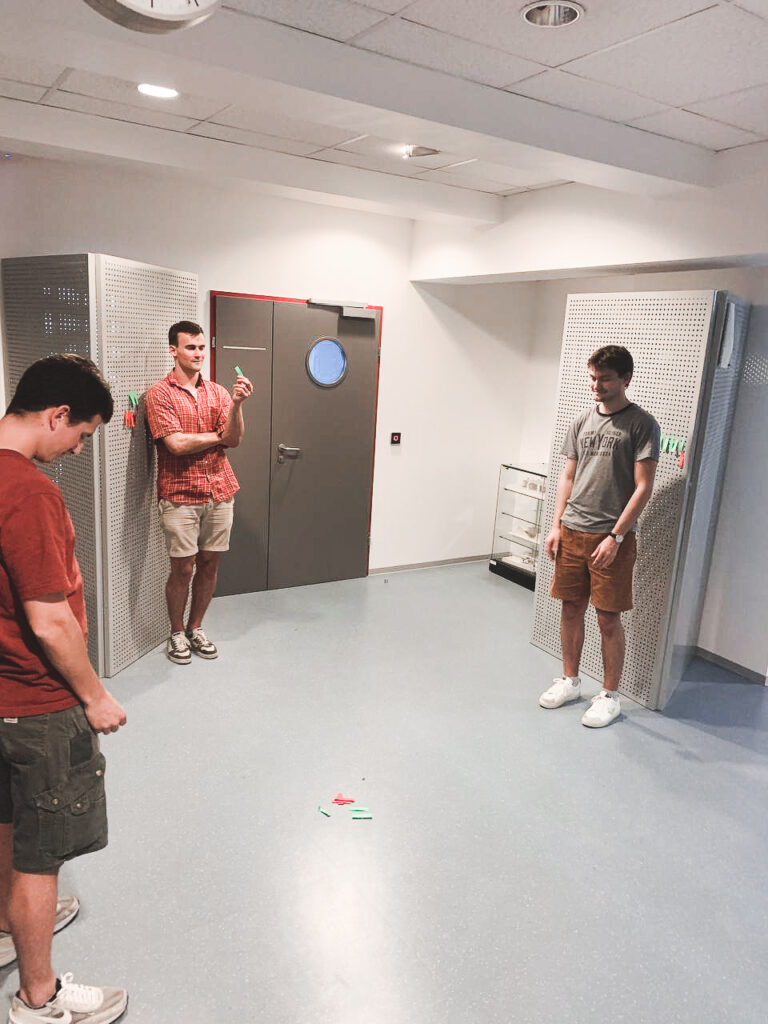
The first day was quite busy. We were divided into two personal groups and we started brainstorming. The task was a joint effort to understand what chromatin is and show us what it is associated with the studs. In the further process, it really helped, because many of us found the beginning of bare ideas in brainstorming. My colleague and I decided to design a game that would mechanically show the operation of chromatin and DNA. We decided to target schools and educational institutions as places to use the game, and students became our main target group. The most difficult thing was to explain to someone what chromatin is if you are not an expert in it yourself. Especially when you have one day of experience with the topic.

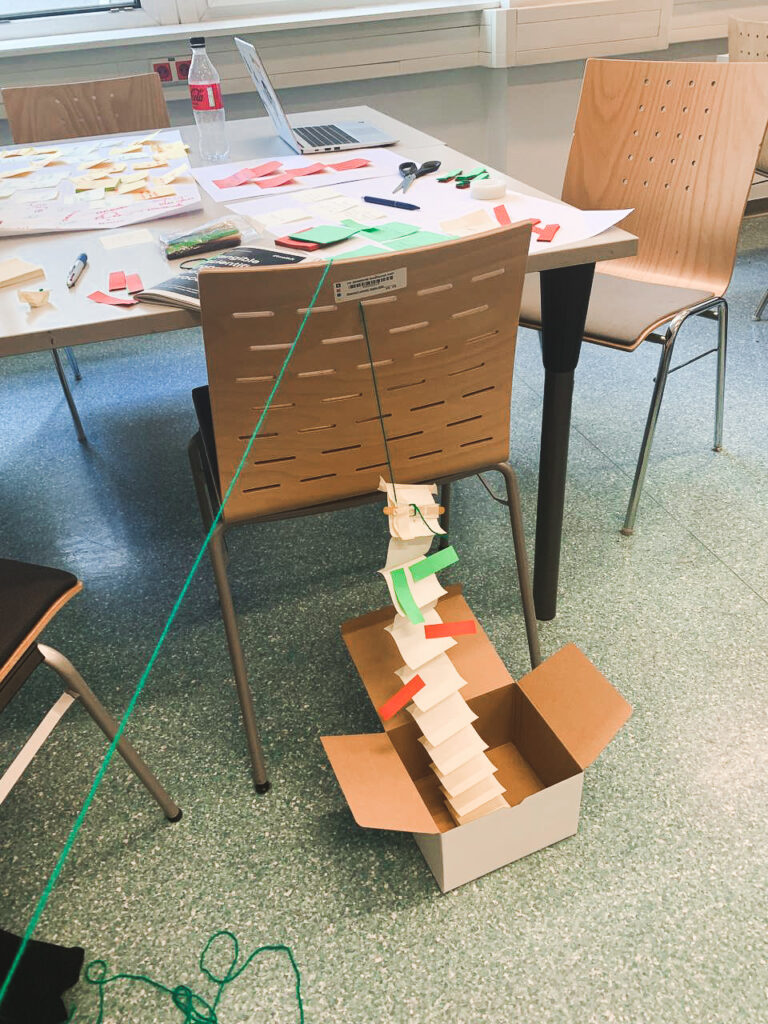
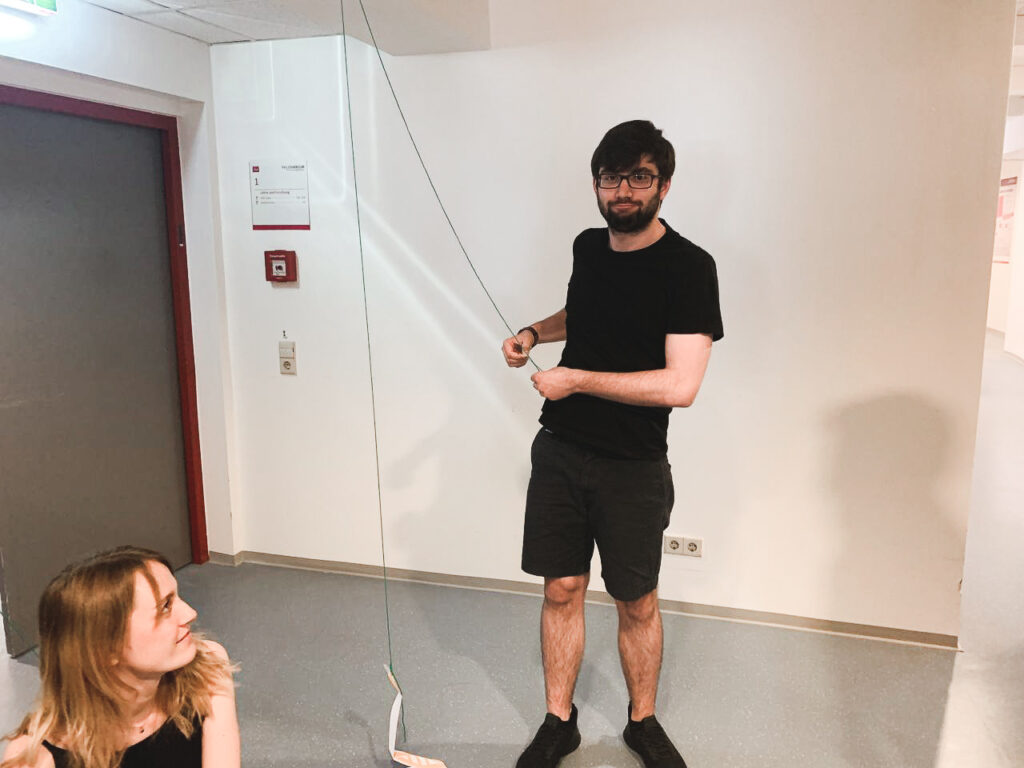
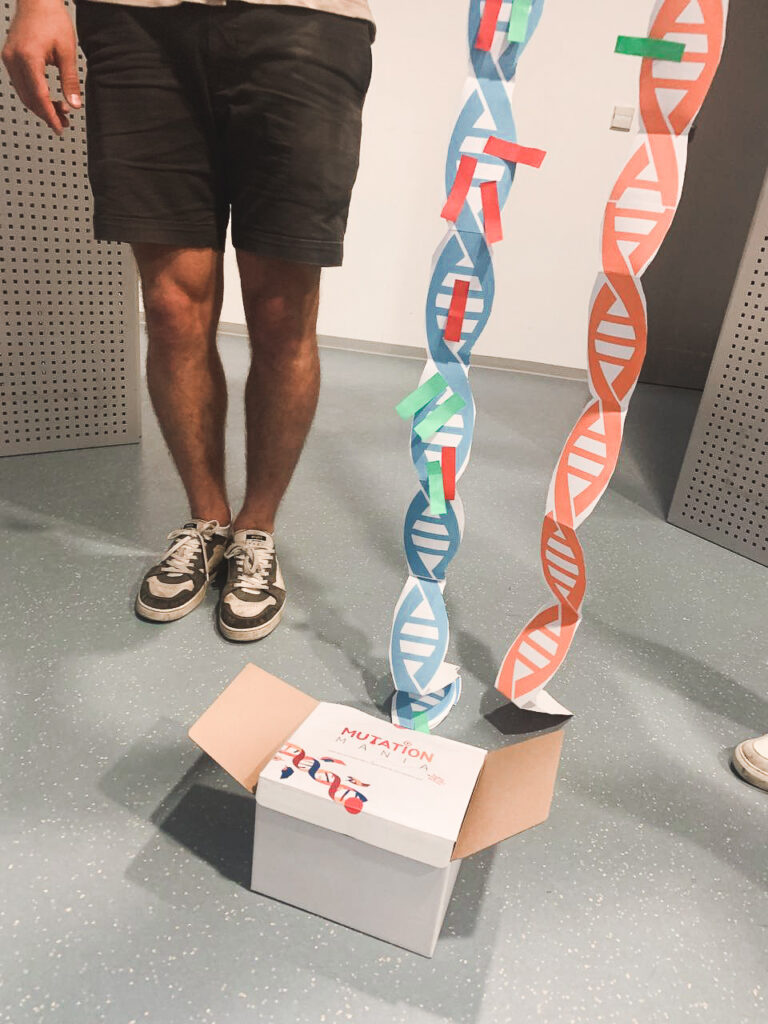
The next day we were scheduled to design low-quality prototypes and we moved to the next stage with Carla’s toolkit. We were still trying to figure out how chromatin works and how to show it in a game for children so that they do not lose interest and it helps them in the learning process. The main element in the game was the transfer of genes from one DNA stream to another. We wanted to give children the opportunity to collect good genes and get rid of bad ones. It was important to involve the players in the process and allow them to play a major role. After the first layouts and attempts, we decided to test the game on our colleagues in order to identify the main problems in the process and be the first to receive feedback from users. After the testing process, we realized that we made several mechanical mistakes in the game itself and that is focused on the process of creating DNA and not on chromatin. In the end, we added a few interesting things so that the main thing in the game still remains chromatin. In order to better understand the processes that take place during the creation of DNA, we began to look for people in our circle of friends who are professionally connected with biology, this really helped in the final result. The last day turned out to be the most difficult because it was then that we had to finish all the drafts so that we could present them well the next day. Under the pressure of time and our efforts, we tried to finish everything before the final deadline.
A little about the game itself. The game is based on the process of DNA creation and gene transport. The main element is the player, which is attached to his individual DNA. When a player chooses to collect more good genes from a chromatin point or throw bad genes at one of their opponents, they open themselves up and are vulnerable to attacks. The game is designed for 2+ players because the main task is to take away as many good genes as possible. The person with the best genes wins. Also, the game stops when the first player gets rid of all bad genes.

The whole design week ended with a presentation, everyone could show what he had been working on all these days. Personally, I want to add that I would never change my workshop to another one. An incredible experience, working with wonderful people, and a wealth of knowledge. The week turned out to be productive and interesting.

This is service design thinking

For my project work after the summer I will be working with the emergency room (ER) in Trondheim to improve their patient experience. My design supervisor for the project recommended that I read the book: “This is service design thinking: Basics, tools, cases” to get an overview of the process I should apply to such an open task. Service design is not new to me. It is, in a way, what I study in Trondheim, however I had never read a whole book on the topic before. I read the book and this article is a summary of the things I learned. 

Basics

There really is no good definition for service design. It is an evolving field and its borders are unclear. However there are five principles that always apply to service design.

User centered

To make services you have to include the customer in some way, since services can not exist separately from the user experience. However, making your services user centered is not always easy. The book uses this example: “Think of two customers. Both were born in 1948, male, raised in Great Britain, married, successful and wealthy. Furthermore, both of them have at least two children, like dogs and love the Alps. One of them could be Prince Charles and the other one Ozzy Osbourne.” Data is important, but you can not use it alone. The designer has to get an insight into the cultural and social context as well as the motivation of the users. It is also important to have a common language that you share with your users. This makes operations like customer service much easier.

Co-creative
Everyone can be creative, and they should! Putting the customer at the center of the process involves opening creation up to them as well. As more stakeholders are added such as cashiers, customer service operators and management, more opportunities for co-creation opens up. These people know exactly what they need to do their job effectively and only by allowing them into the process can they show that to the designer. It also makes transitions across interactions smoother. Making it vital to the service design process.

Sequencing

Imagine your service as a movie. An ever changing picture for the user that takes place over a certain period of time. It is important to arrange the pictures in such a way that they make sense, and tell the story that you want to tell. To influence this one can map out all of the different interactions the user has with the service, so called touchpoints, and arrange them in the best way possible. Perhaps some steps occur too early, or crucial information is not given at the right time. It is also important to think about the user’s action before they encounter your service. For example, imagine going to the hairdresser, the first point you should consider is when the user thinks about getting a haircut. Where, what, and how they get information are important points to consider if you want to capture the customer at an early stage.

Evidencing

Some services, like housekeeping at a hotel, are designed to be invisible. However, if customers do not notice it and it shows up on their bill, they are not going to be happy. Imagine your last holiday, you probably brought home some souvenirs. Pictures, a jar of sand or a shot glass with a flag on it. These all help you remember the experience you had and evidencing for service design works the same way. As a physical object to remind you of something and prolong the user experience. However, there is a limit to this. Think of junk mail as evidencing gone too far.

Holistic

Completely holistic design is sadly impossible. The world is just too complex for us to take every single thing into account. However, one should always strive to see the bigger picture. The context around the service is very important to consider to ensure user satisfaction. The also says: “At the level of the service sequence, there should be a focus on alternative customer journeys. There are always a number of alternative touchpoints and approaches, which need to be taken into account. Sequences change and need to be repeatedly reappraised from various perspectives to ensure a great customer experience. Hence, it is important to map the mood and feelings of all stakeholders throughout the service journey.” Holistic thinking is important to ensure satisfaction.

The book summarizes it better than I could: “service design thinking supports the

cooperation of different disciplines towards the goal of corporate success through enhanced customer experiences, employee satisfaction, and integration of sophisticated technological processes in pursuing corporate objectives.”

Tools

There are many tools presented in the book. I want to highlight two that I found interesting and plan to use. 

Stakeholder maps

Stakeholder maps are created by making a list of all known stakeholders to the service and then mapping it out visually, often grouping by internal and external stakeholders. Furthermore stakeholders with similar tasks or many interactions can be clustered together making it easier to spot potential synergies. Flows between different stakeholders can also be visualized, materials, money, information or labor. This also contributes to a simpler overview of a complex system.

Service blueprint

A service blueprint specifies and details each specific part of a service. This is then presented visually, usually showing the chronology and level of the touchpoints with the customer as well as what is going on in the background. Service blueprints should be made collaboratively, bringing together people from different departments, as well as users, to create a more holistic overview. This might also create understanding between different departments. It should also be a ‘living document’ that changes when the service or service provider does to give an up to date image.

Summary

There were also some cases in the book that were interesting as they laid out how these tools, methods and principles could be applied in a real life environment. I really enjoyed the book as it made many principles I had learned about before more concrete and laid them out in an easy to navigate way.